Connecting a Phone
Make sure your phone is unlocked by your carrier. Go to Settings > About > Scroll down to Carrier Lock. No Sim Restrictions means the device is compatible.
Follow these steps to stay connected across campus (iPhone 11 or newer versions, including the SE 2nd generation and SE 3rd generation. Other phone users contact ITS):
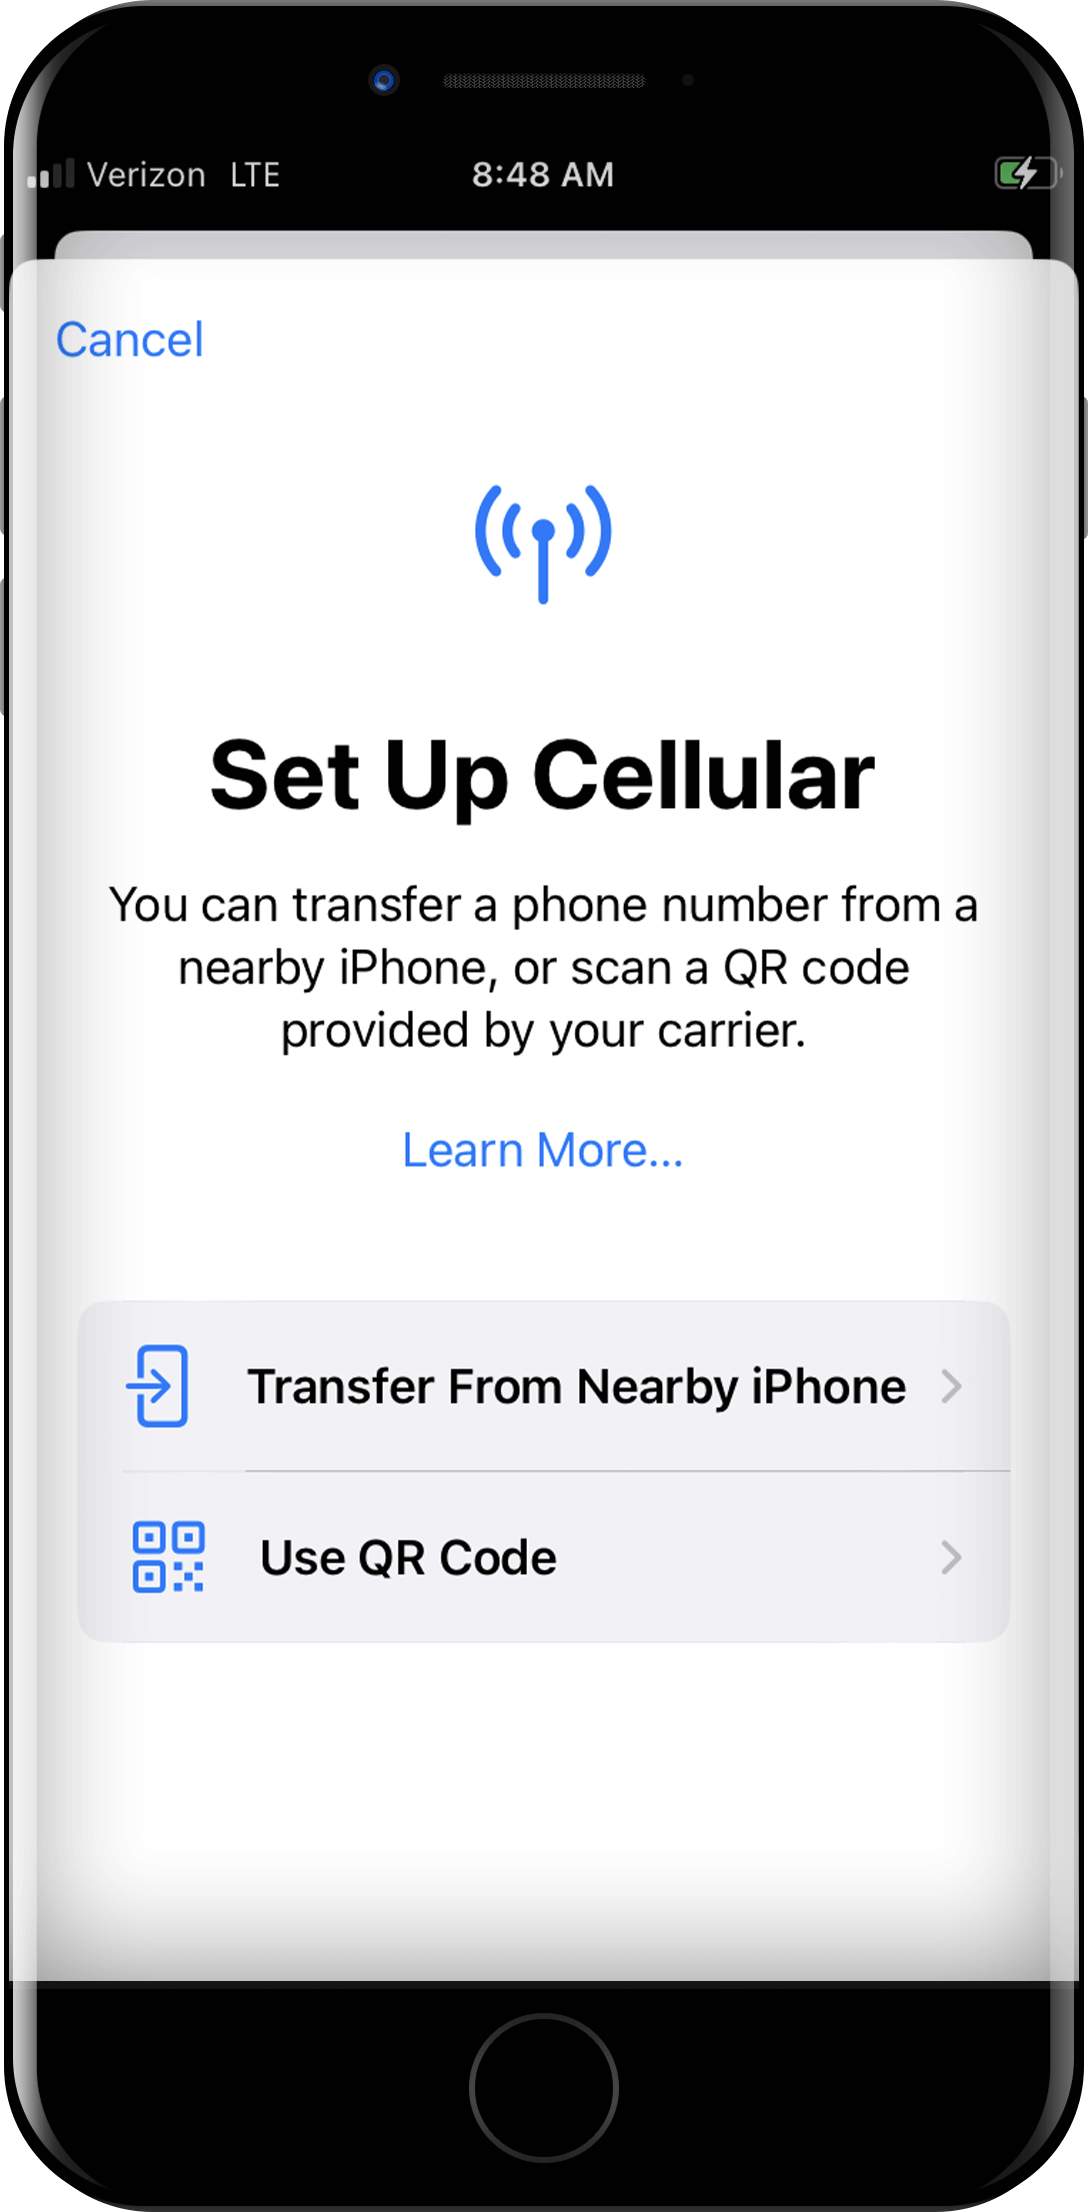
- On your computer, or another device other than the one you want to onboard, go to netid.syr.edu/selfserv/login > click private cellular wireless > type in netID & password > show QR Code
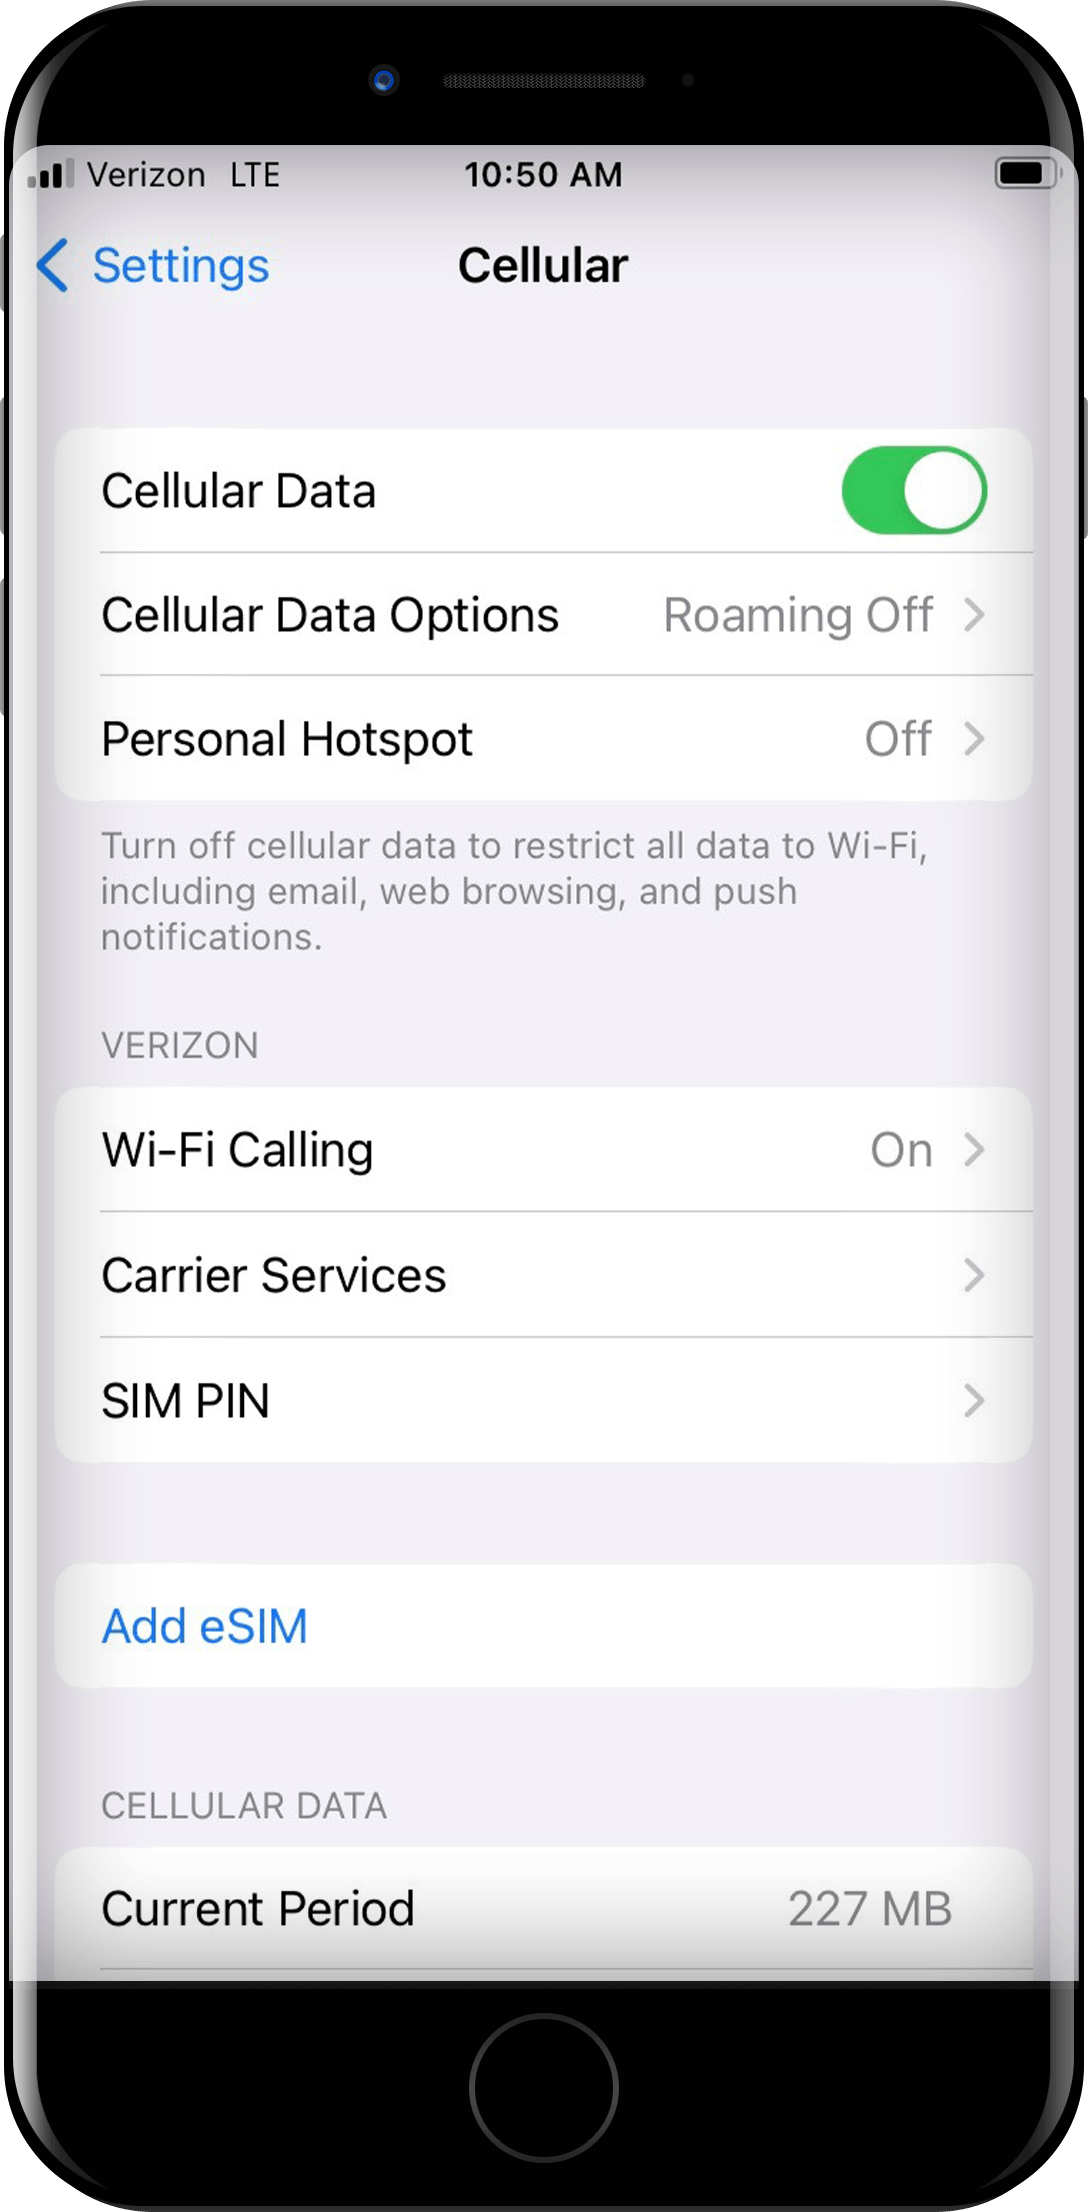
- On your iPhone, go to Settings
- Tap Cellular
- Tap Add eSim
- Scan QR Code from your computer
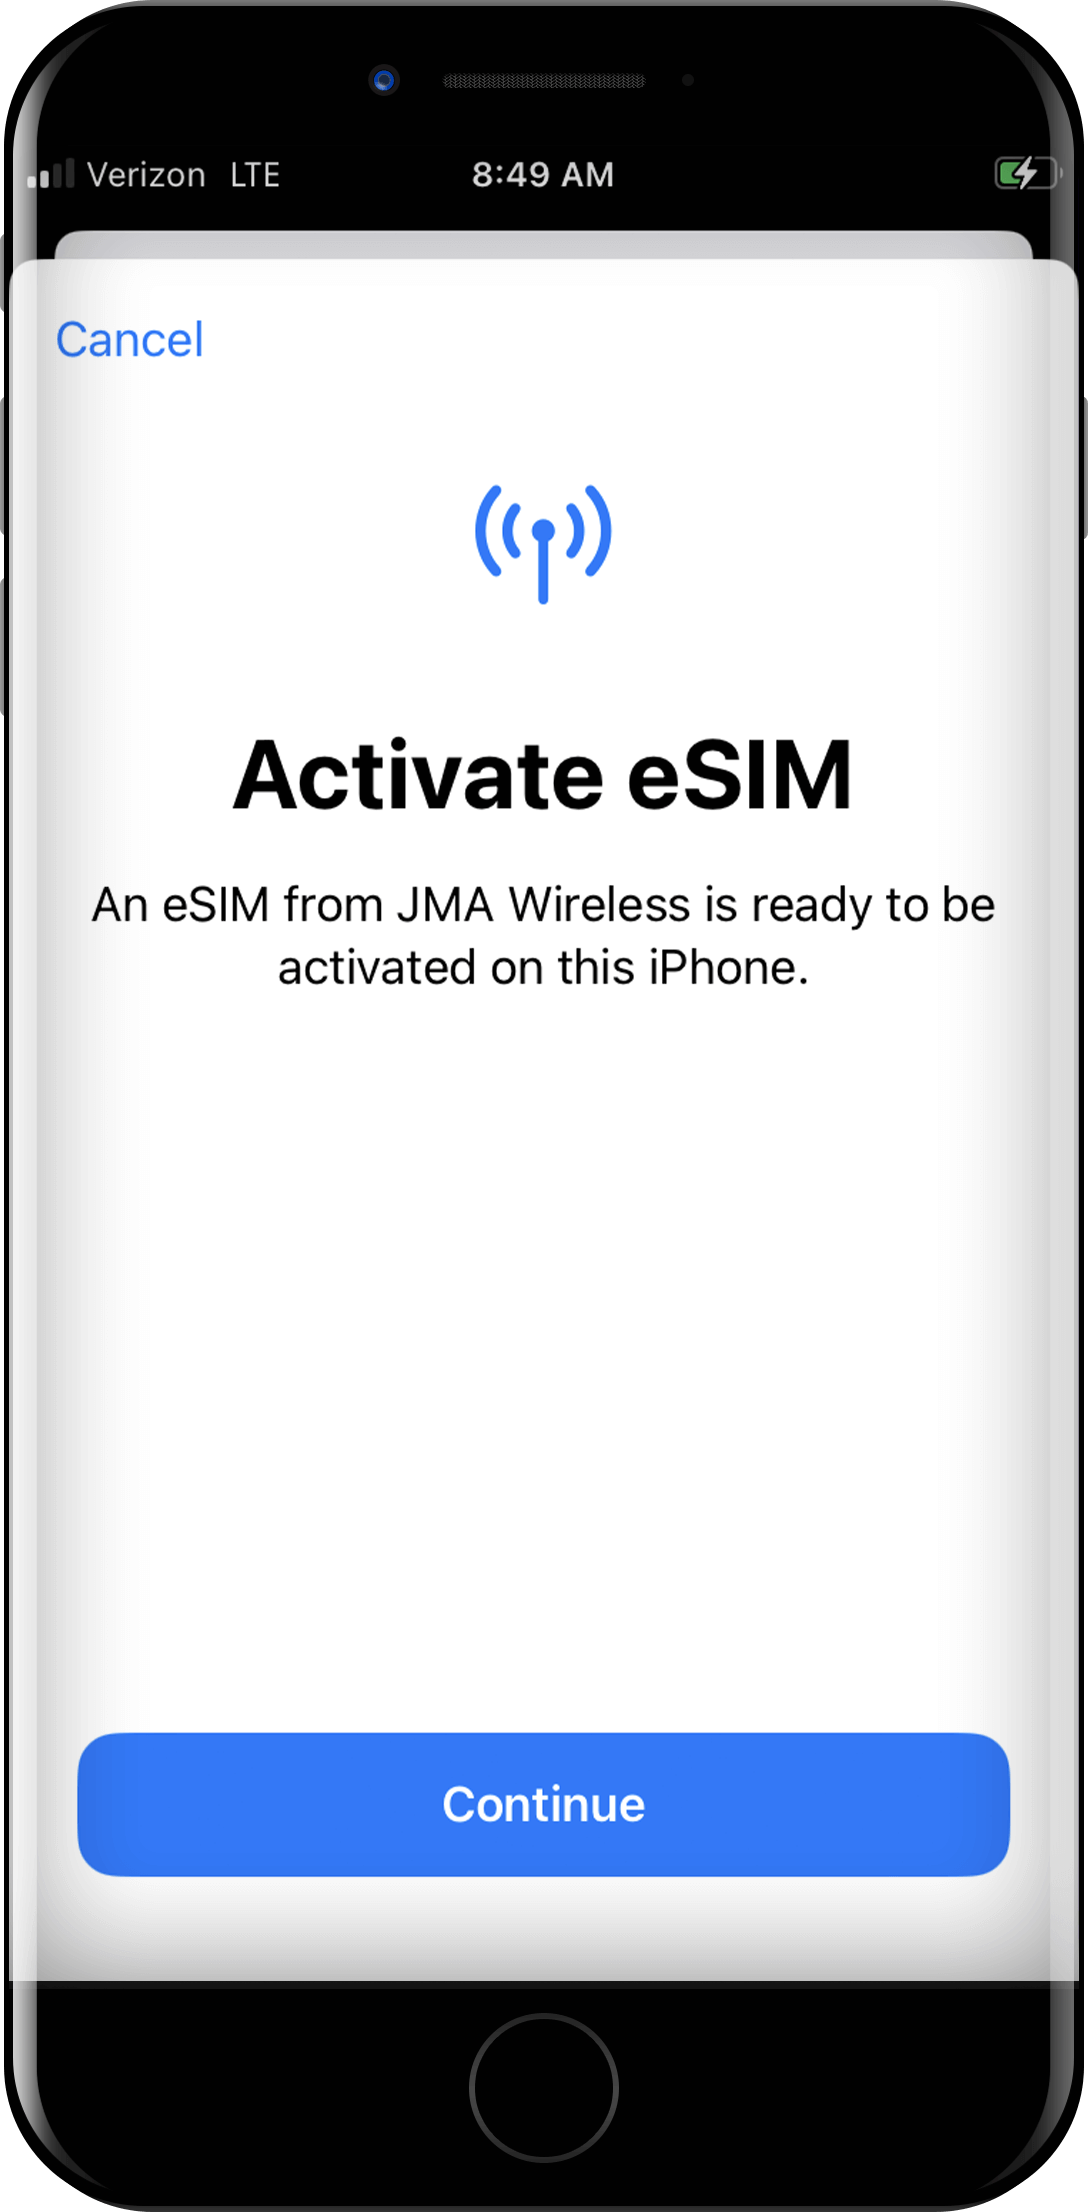
- Tap continue to activate eSim
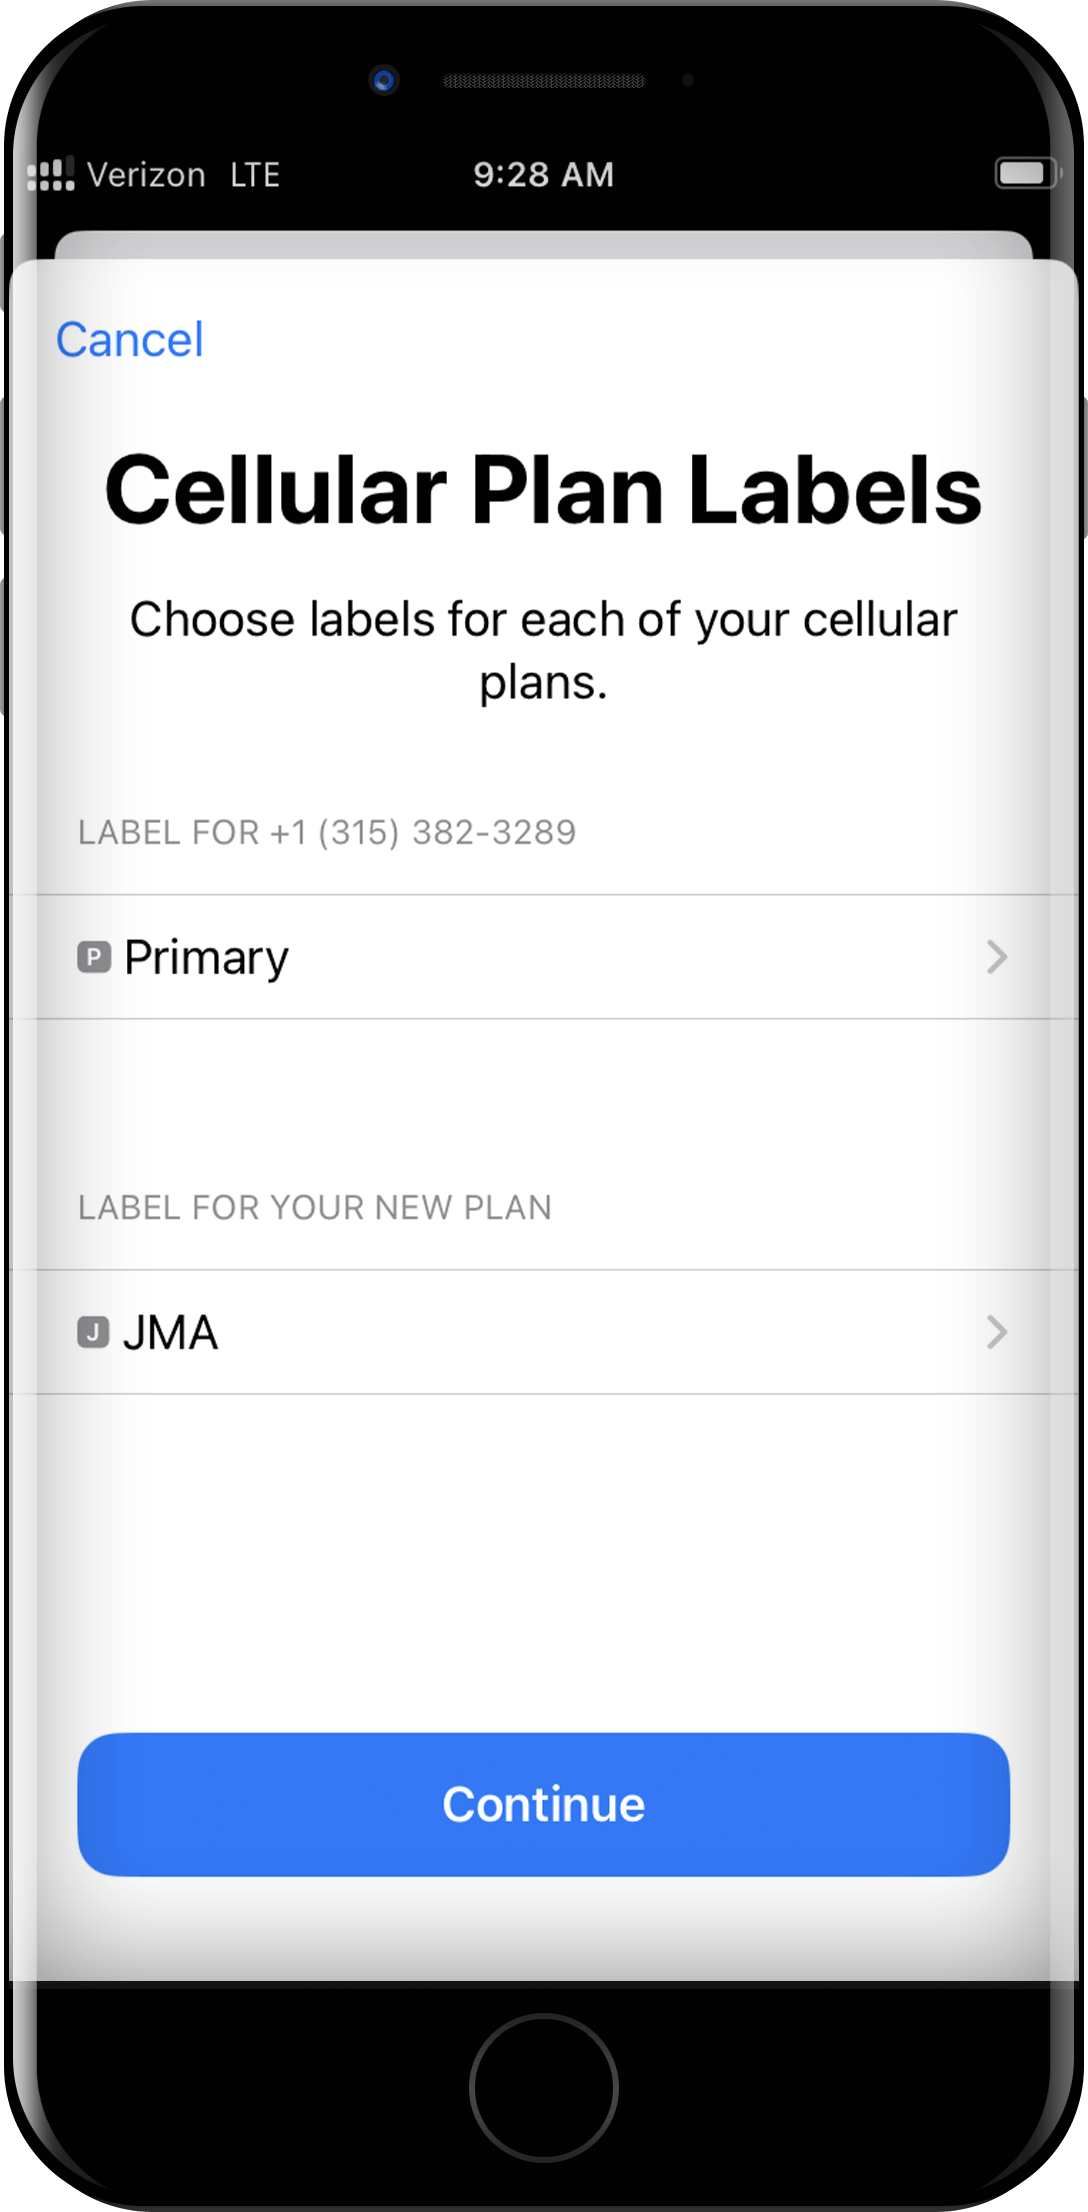
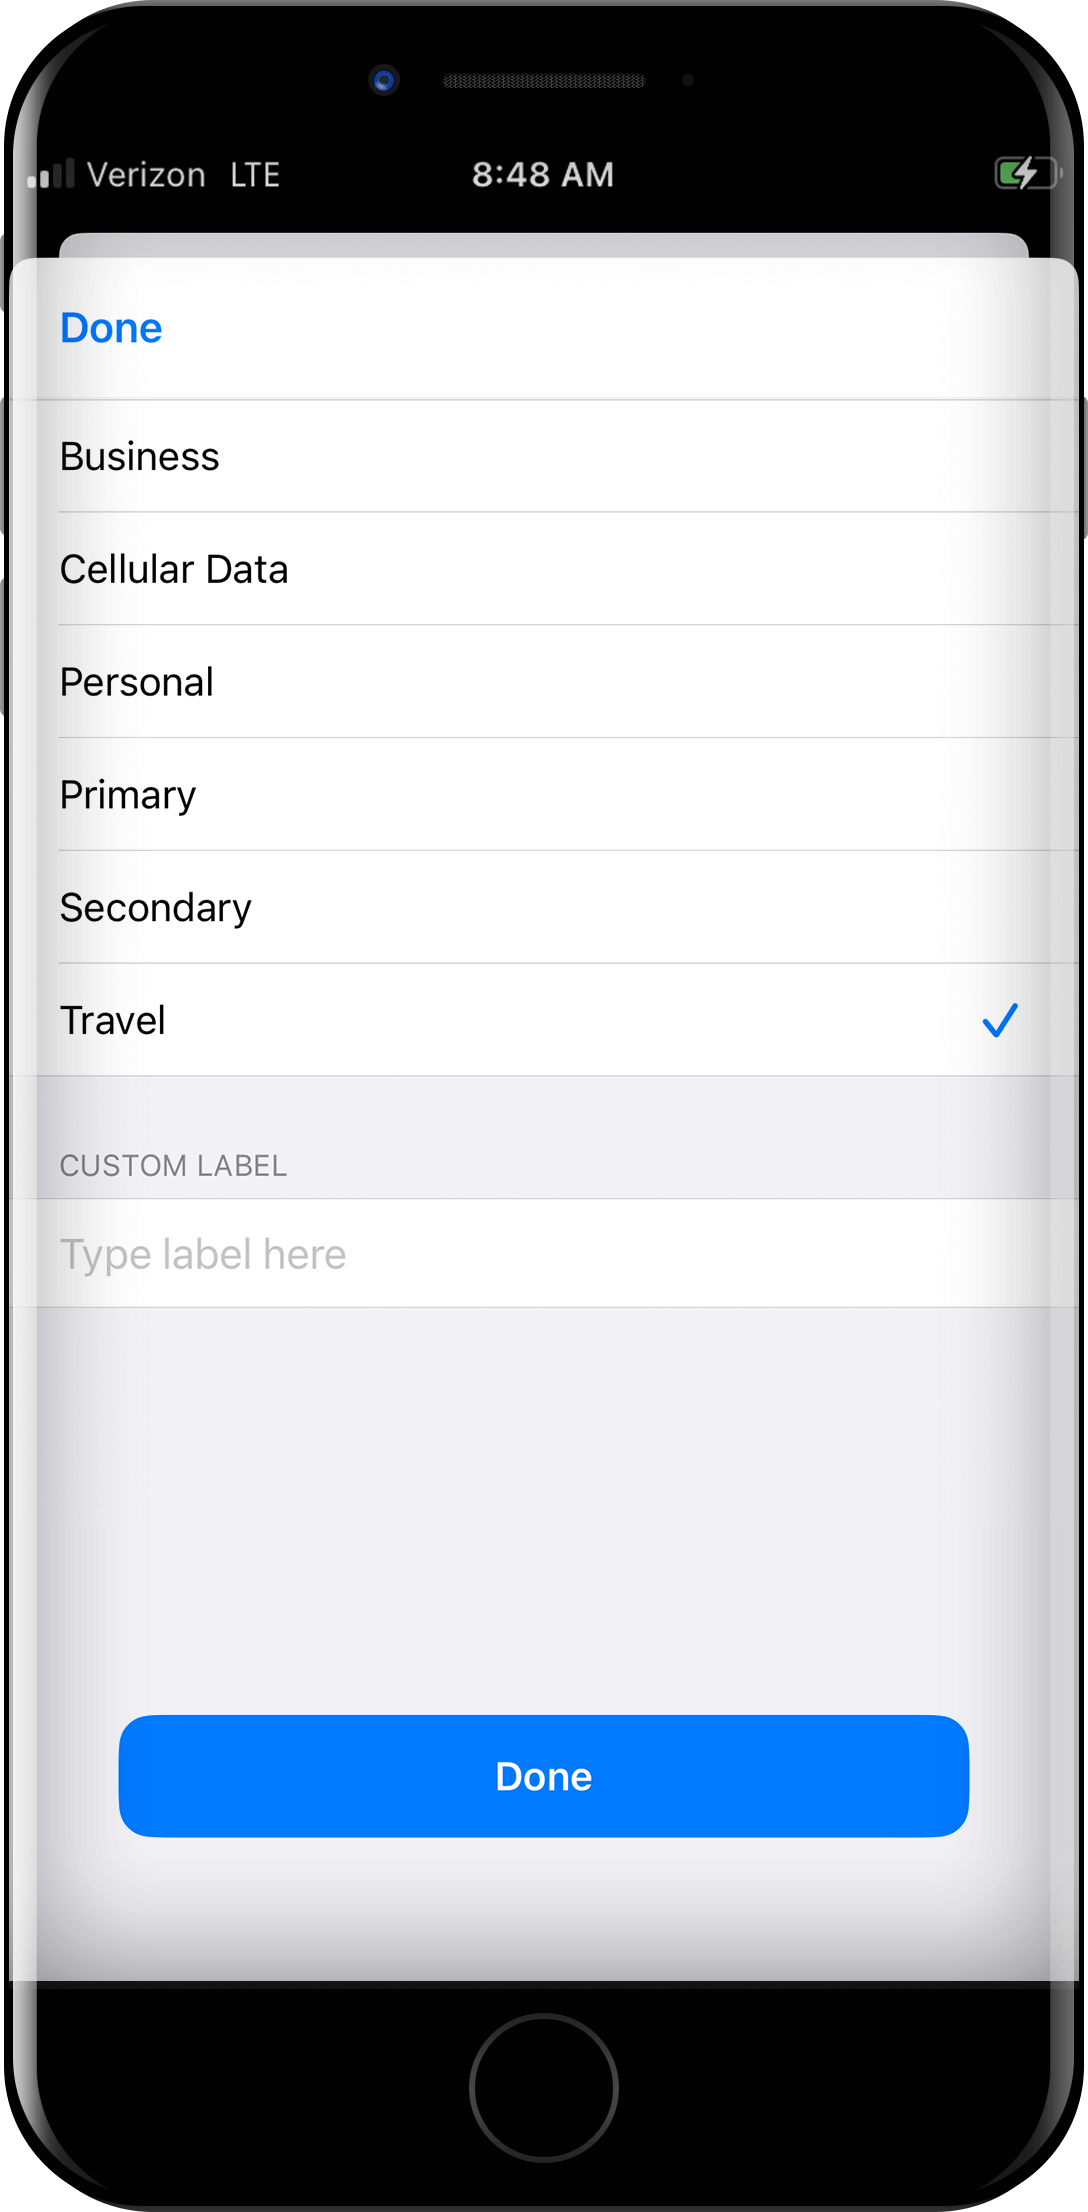
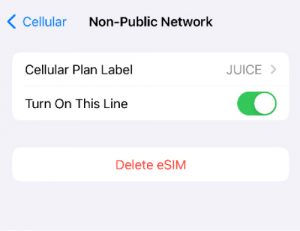
- If you are prompted to Cellular Plan Labels. Select Label for your New Plan to rename the network. (If this step doesn’t show, move onto step 9)
- Choose what label you have for your SU Private Wireless, we chose “JMA” in our example, but this can be anything under the “Custom Label” tag. Once you are done, you can select Continue
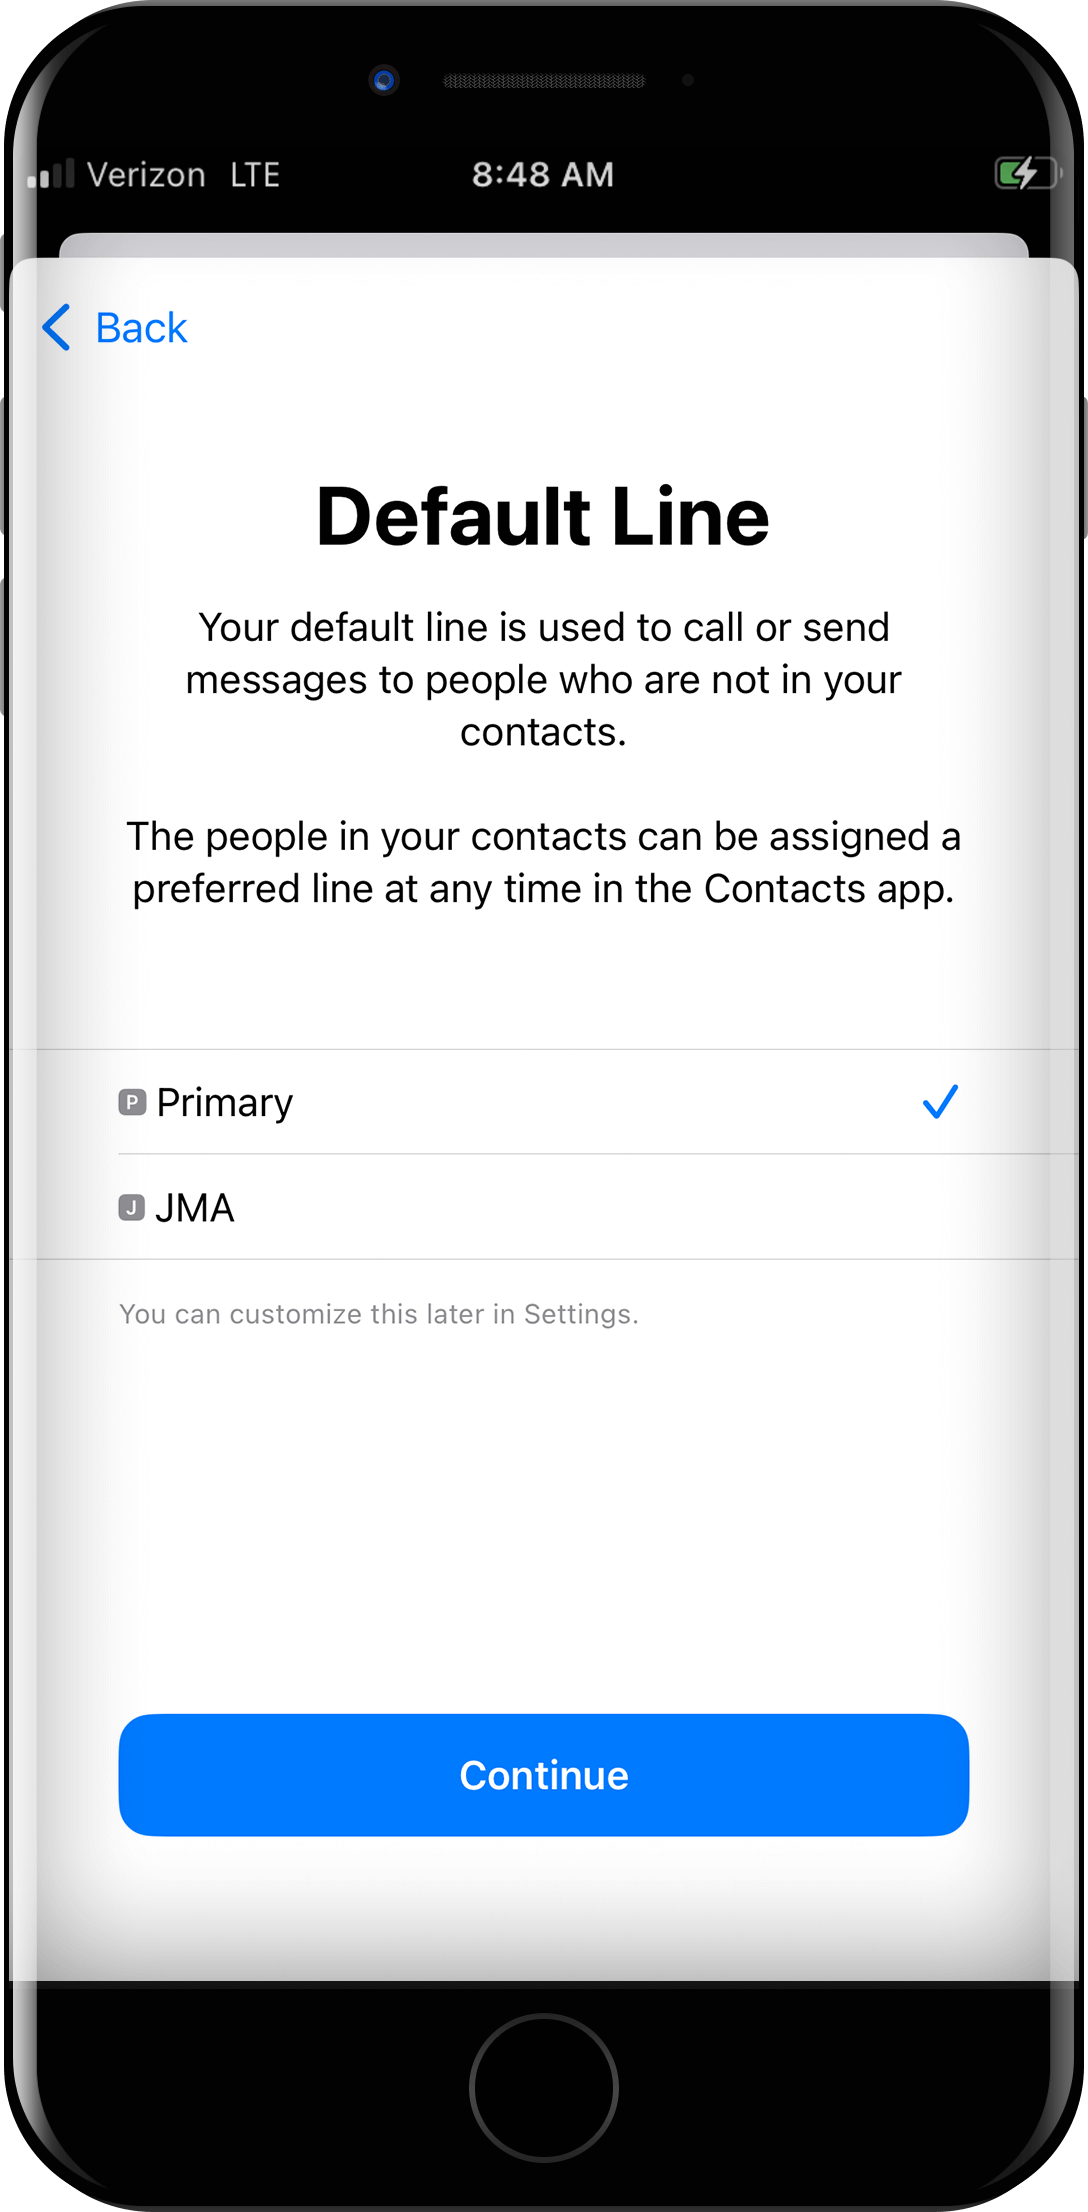
- Select Primary for Default Line
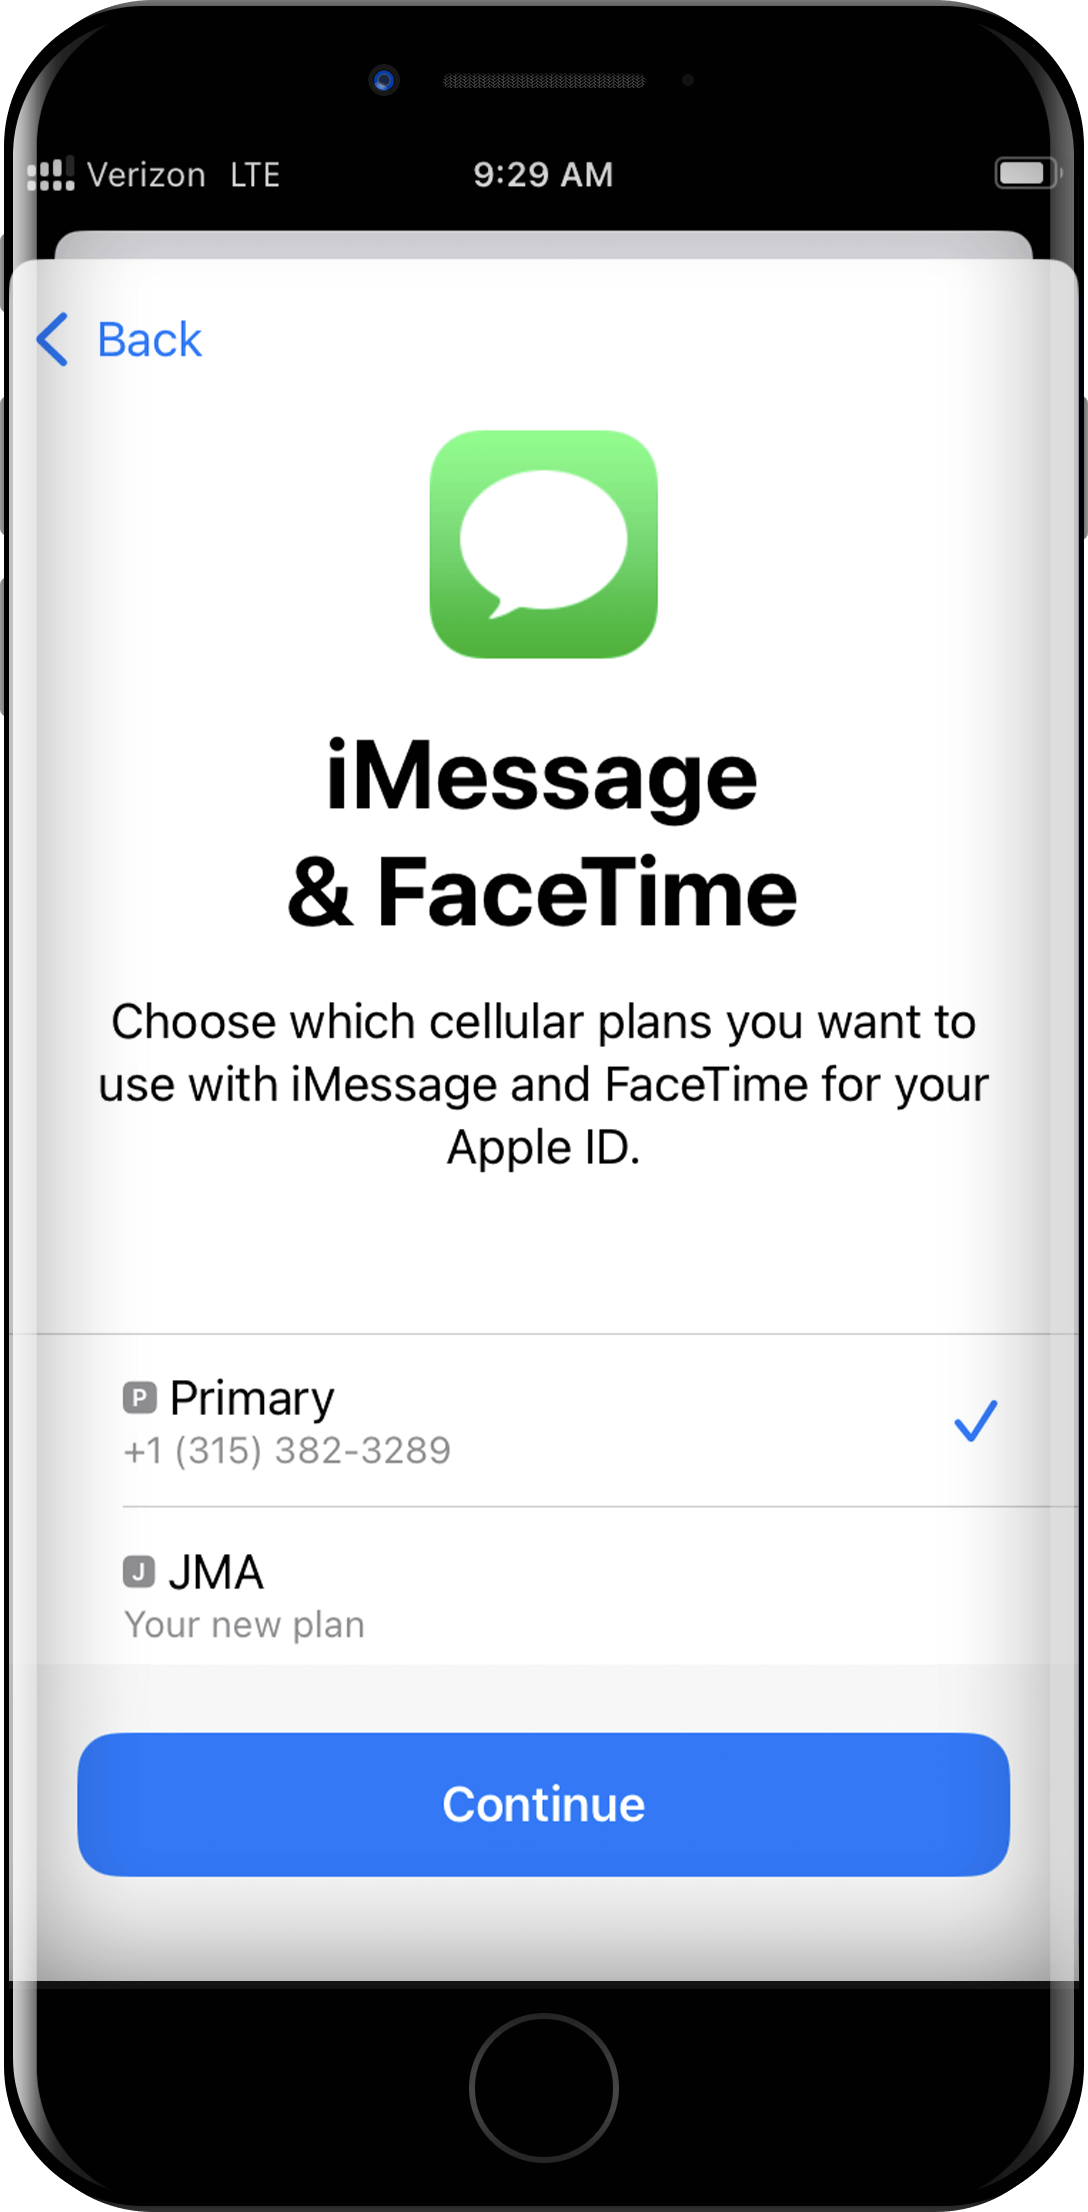
- Select Primary, for iMessage and FaceTime
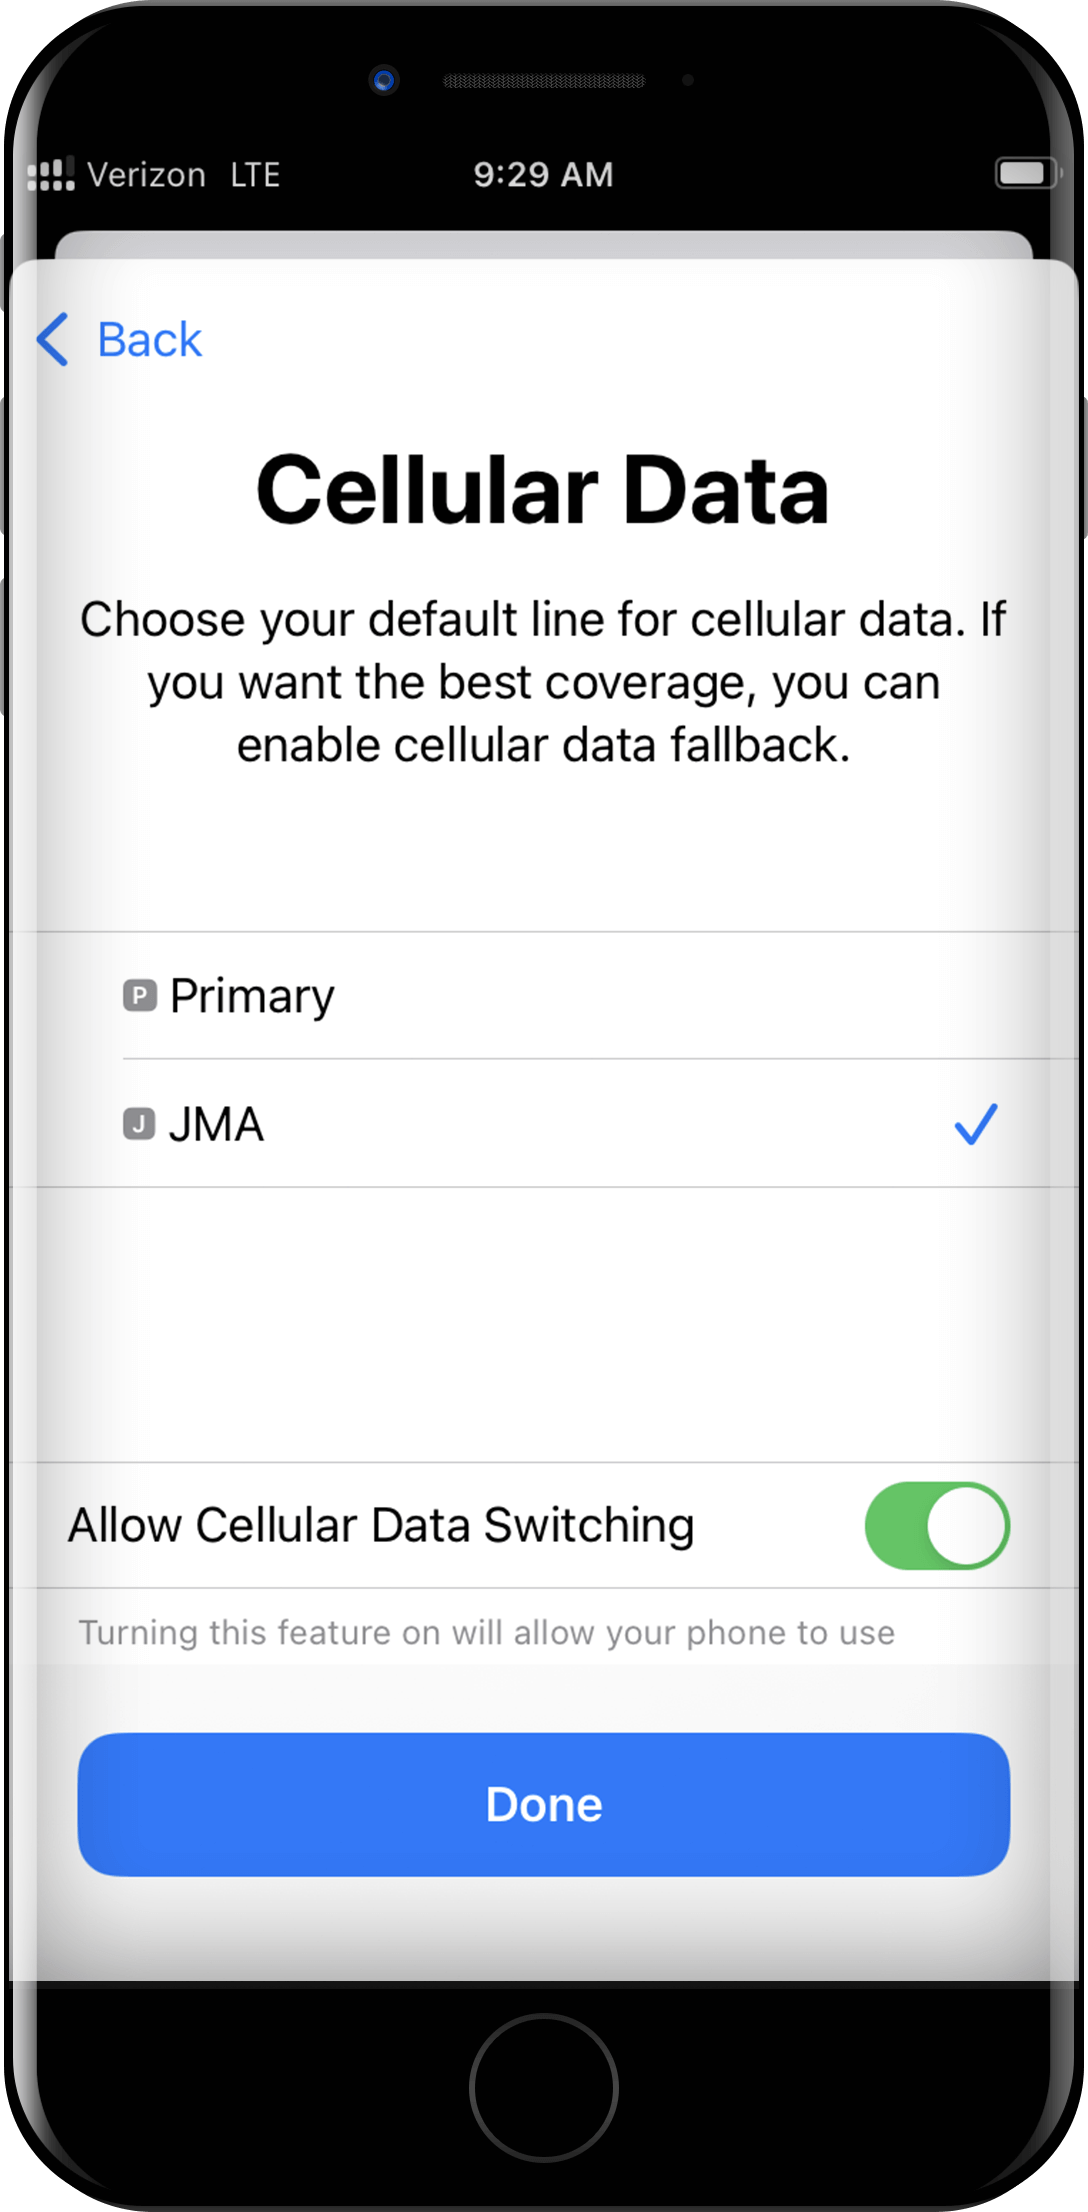
- You will be prompted for which service you want to use as default for cellular data. You will select what you chose for your custom label or options might show as business, secondary, or travel, in our example we selected “JMA.” Turn on Allow Cellular Data Switching
- The SU Private Wireless will appear on top of your cellular plan.
- Now go back to Settings
- Tap Cellular
- Select the private network eSIM
- Select cellular data network
- Under APN in Cellular Data, type SU
- Scroll down to personal hotspot APN
- Under APN type SU again – this will help with smoother transitions in and out of campus coverage
Step 3
Step 4
Step 6
Step 8
Step 9
Step 10
Step 11
Step 12
If you need to turn on your JMA Network eSIM:
- Go to settings > cellular
- Tap the JMA Network eSIM
- Tap the toggle to turn it on
- Hit back and then tap “Cellular Data” at the top of your screen
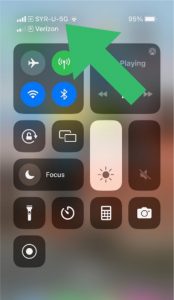
- Make sure your screen looks like the screenshot below

Now make sure you’re getting all the benefits of the JMA Network:
- Go into settings > cellular and tap on “Cellular Data” located at the top of your screen.
- Your screen should look like this with a check mark next to the JMA Network (yours may be named something different than this screenshot) and “Data Switching” toggled on.
Note: Data switching makes the process of leaving the SU campus and coming back smoother and quicker. - If it doesn’t look like this, select the JMA Network so that a checkmark appears next to it and make sure data switching is still toggled on.
- When complete, the JMA Network should appear on top of your primary phone plan like the screenshot below.
Tethering
Tethering takes the private network connection from the phone and sends it to the computer using a USB cord. In a short sequence of steps, you can enable tethering through your phone using the appropriate USB cord for your computer.
- On your iPhone, go to Settings
- Tap Cellular
- Select the private network eSIM
- Select cellular data network
- Scroll down to personal hotspot APN
- Under APN put any character you want
- Watch the video below:
- Confirm you have the appropriate cord
- Unplug cord and plug cord back in
- Toggle Airplane mode on and off
- Make sure there are no pending updates on your phone or computer
- Call ITS if you are still having issues
If you need to turn on your JMA Network eSIM:
- Go to settings > cellular
- Tap the JMA Network eSIM
- Tap the toggle to turn it on
- Hit back and then tap “Cellular Data” at the top of your screen
- Make sure your screen looks like the screenshot below
Now make sure you’re getting all the benefits of the JMA Network:
- Go into settings > cellular and tap on “Cellular Data” located at the top of your screen.
- Your screen should look like this with a check mark next to the JMA Network (yours may be named something different than this screenshot) and “Data Switching” toggled on.
Note: Data switching makes the process of leaving the SU campus and coming back smoother and quicker. - If it doesn’t look like this, select the JMA Network so that a checkmark appears next to it and make sure data switching is still toggled on.
- When complete, the JMA Network should appear on top of your primary phone plan like the screenshot below.
Campus Coverage
- Marion Hall
- Kimmel Hall & Dining Center
- Ernie Davis Hall
- Carnegie Library
- Bowne Hall
- Shaffer Art Building
- Sims Hall
- Biological Research Lab
- Shaw Hall and Dining Center
- Flint Hall
- Day Hall
- Women’s Center
- Schine Student Center
- The Barnes Center At The Arch
- Flanagan Gym
- JMA Dome
- Graham Dining Center
- Oren Lyons Hall
- Booth Hall
- DellPlain Hall
- Boland Hall
- Brewster Hall
- Brockway
- Center For Science & Technology
- Life Sciences Complex
- Newhouse 1
- Newhouse 2
- Newhouse 3
- Eggers Hall
- Bird Library
- Falk College
- Hall Of Languages
- Haven Hall
- Hendrick’s Chapel
- Hinds Hall
- Lawrinson Hall
- Sadler Hall & Dining Center
- Whitman School of Management
- Slocum Hall
- Smith Hall
- Walnut Hall
- Washington Arms
- Watson Hall
- Crouse College
- Dineen Hall College Of Law
- H. B. Crouse
- Heroy Geology Laboratory
- Huntington Hall
- Link Hall
- Lyman Hall
- Maxwell School of Citizenship
- Physics Building
- Steele Hall
- Tolley Humanities Building
- NVRC
QR code inquiry
If you are having issues locating your QR Code or have questions about eligibility, please reach out to the ITS Service Center at 315 443 2677 or [email protected].